- Docs
- /
SQL Server on Azure Virtual machine
24 Feb 2021 31240 views 0 minutes to read Contributors ![]()
SQL Server on Azure Virtual machine
SQL Server on Azure Virtual Machines enables you to use full versions of SQL Server in the cloud without having to manage any on-premises hardware. SQL Server virtual machines (VMs) also simplify licensing costs when you pay as you go.
Azure virtual machines run in many different geographic regions around the world. They also offer a variety of machine sizes. The virtual machine image gallery allows you to create a SQL Server VM with the right version, edition, and operating system. This makes virtual machines a good option for many different SQL Server workloads.
Key Features of Using SQL Server on Azure Virtual machine
1) Automated updates
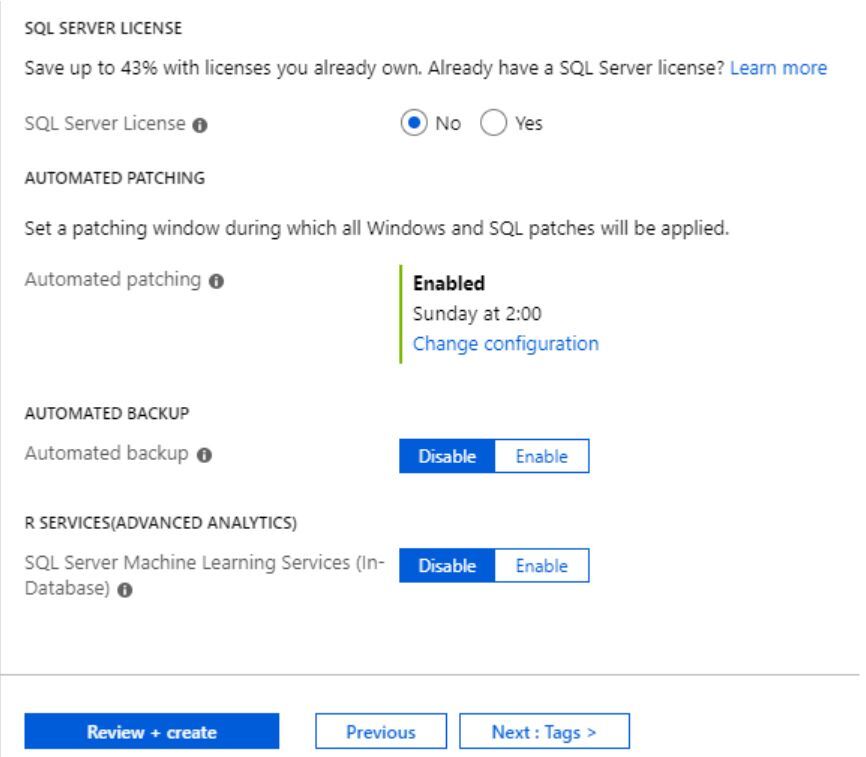
SQL Server on Azure Virtual Machines can use Automated Patching to schedule a maintenance window for installing important windows and SQL Server updates automatically.
2) Automated backups
SQL Server on Azure Virtual Machines can take advantage of Automated Backup, which regularly creates backups of your database to blob storage. You can also manually use this technique.
Azure also offers an enterprise-class backup solution for SQL Server running in Azure VMs. A fully-managed backup solution, it supports Always On availability groups, long-term retention, point-in-time recovery, and central management and monitoring.
3) High availability
If you require high availability, consider configuring SQL Server Availability Groups. This involves multiple instances of SQL Server on Azure Virtual Machines in a virtual network. You can configure your high-availability solution manually, or you can use templates in the Azure portal for automatic configuration. For an overview of all high-availability options, see High Availability and Disaster Recovery for SQL Server in Azure Virtual Machines.
4) Performance
Azure virtual machines offer different machine sizes to meet various workload demands. SQL Server VMs also provide automated storage configuration, which is optimized for your performance requirements.
Create and manage Azure SQL resources with the Azure portal
The Azure portal provides a single page where you can manage all of your Azure SQL resources including your SQL virtual machines.
1) To access the Azure SQL resources page, select Azure SQL in the Azure portal menu, or search for and select Azure SQL from any page.
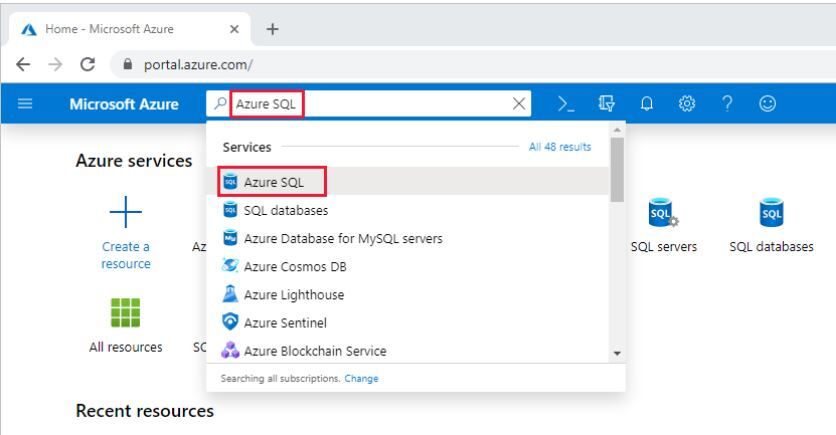
2) To manage existing resources, select the desired item in the list. To create new Azure SQL resources, select + Add.

3) After selecting + Add, view additional information about the different options by selecting Show details on any tile.
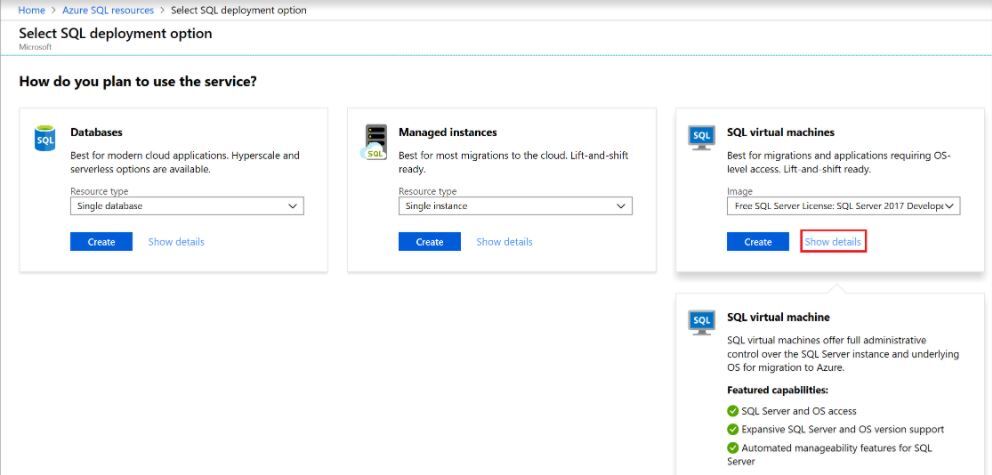
4) Provide basic details
On the Basics tab, provide the following information:
- In the Project Details section, select your Azure subscription and then select Create new to create a new resource group. Type SQLVM-RG for the name.
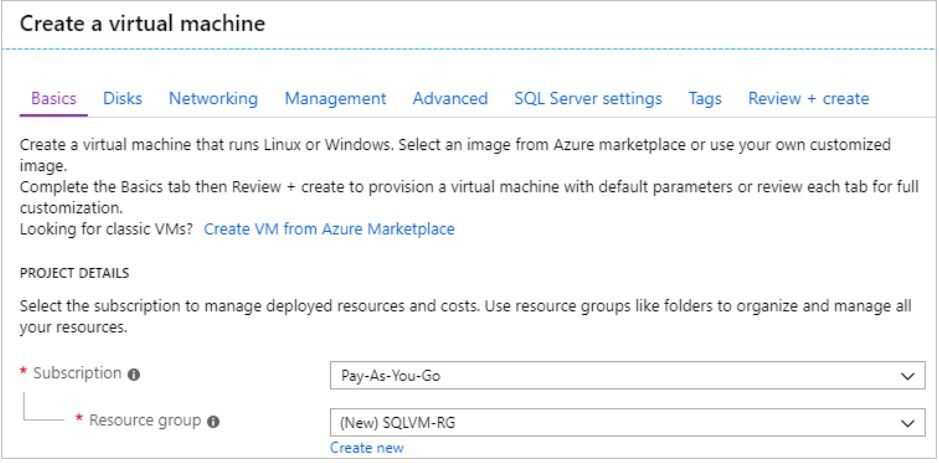
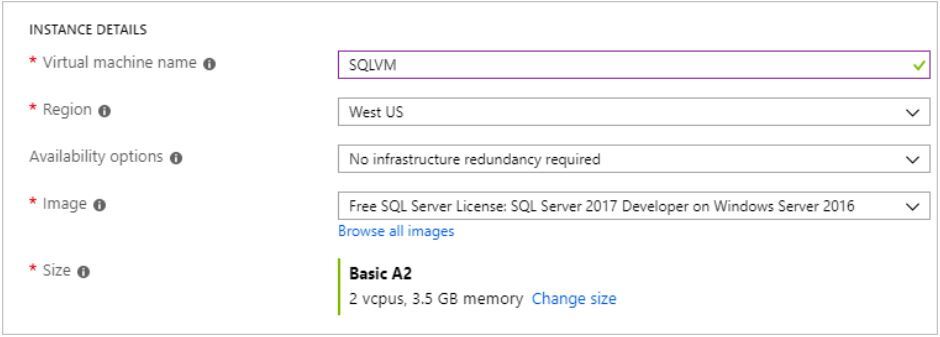
5) Under Instance details:
- Type SQLVM for the Virtual machine name.
- Choose a location for your Region.
- For the purpose of this quickstart, leave Availability options set to No infrastructure redundancy required. To find out more information about availability options, see Availability.
- In the Image list, select Free SQL Server License: SQL Server 2017 Developer on Windows Server 2016.
- Choose to Change size for the Size of the virtual machine and select the A2 Basic offering. Be sure to clean up your resources once you're done with them to prevent any unexpected charges.
6) Under Administrator account, provide a username, such as azureuser and a password. The password must be at least 12 characters long and meet the defined complexity requirements.

7) Under Inbound port rules, choose Allow selected ports and then select RDP (3389) from the drop-down.

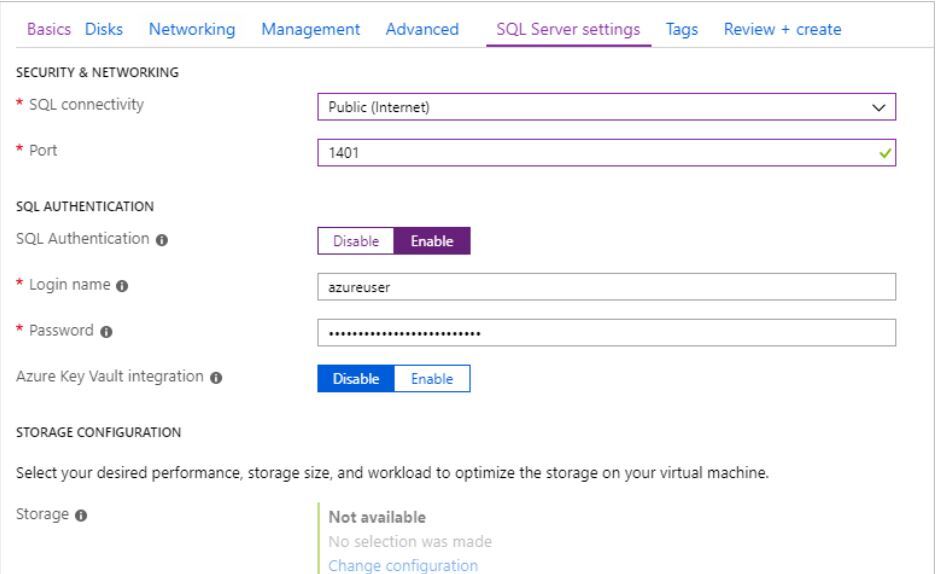
SQL Server settings
On the SQL Server settings tab, configure the following options:
- Under Security & Networking, select Public (Internet) for SQL Connectivity and change the port to 1401 to avoid using a well-known port number in the public scenario.
- Under SQL Authentication, select Enable. The SQL login credentials are set to the same user name and password that you configured for the VM. Use the default setting for Azure Key Vault integration. Storage configuration is not available for the basic SQL Server VM image, but you can find more information about available options for other images at storage configuration.
3) Change any other settings if needed, and then select Review + create.
Create the SQL Server VM
On the Review + create tab, review the summary, and select Create to create SQL Server, resource group, and resources specified for this VM.
You can monitor the deployment from the Azure portal. The Notifications button at the top of the screen shows basic status of the deployment. Deployment can take several minutes.
Connect to SQL Server
- In the portal, find the Public IP address of your SQL Server VM in the Overview section of your virtual machine's properties.
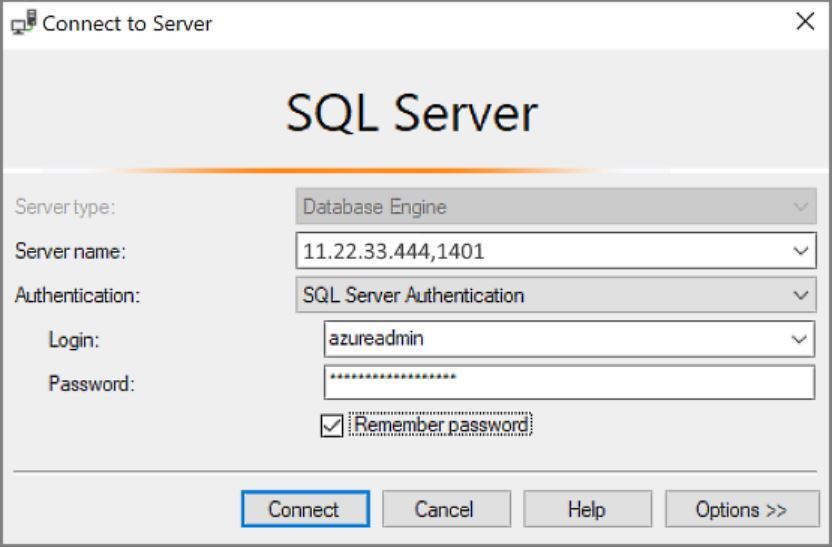
- On a different computer connected to the Internet, open SQL Server Management Studio (SSMS).
- In the Connect to Server or Connect to Database Engine dialog box, edit the Server name value. Enter your VM's public IP address. Then add a comma and add the custom port (1401) that you specified when you configured the new VM. For example, 11.22.33.444,1401.
- In the Authentication box, select SQL Server Authentication.
- In the Login box, type the name of a valid SQL login.
- In the Password box, type the password of the login.
- Select Connect
In this article

